SQL Server Data Tools (SSDT)
03 Feb 2013SSDT is a tool that allows you to develop and deploy databases from within Visual Studio IDE. The tool offers a lot of features, and I can’t explain all of them in one article. However, I will provide a brief overview to get you familiar with it.
SSDT already ships with some editions of Visual Studio 2012, but you can also use it with Visual Studio 2010. It is important to note that SSDT is not intended to be a replacement for SQL Server Management Studio (SSMS).
Where to get it?
http://msdn.microsoft.com/en-us/data/hh297027
Benefits
SSDT allows you to create database projects. A database project is very helpful for managing your database objects (tables, views, indexes, etc). There are many advantages for having a database project:
- Source control: It is easy to keep track of your work changes over time. This is also essential in a team environment.
- Dependencies: You can detect errors before you even deploy your DB. For example, if one of your views is referencing a non-existent table, the project will not compile and will show you an error, so you can fix it immediately.
- Testing: You can debug and unit test your T-SQL code easily.
- Maintainability: It is easier to maintain your database over time. Normally, you will add or drop objects in your database over time. You will also change some T-SQL code in your stored procedures or functions. You can look at the changes you made by comparing different snapshots of your database. You can also test your code before it is released.
- Deployment: You can deploy your database to different servers easily. You can deploy to servers hosting SQL Azure or SQL Server 2005 and above. SSDT also can generate the DDL script, so you can execute it manually if you don’t have direct access to your server.
- Rich environment: You can take advantage of the tools and features in Visual Studio.
Try it out
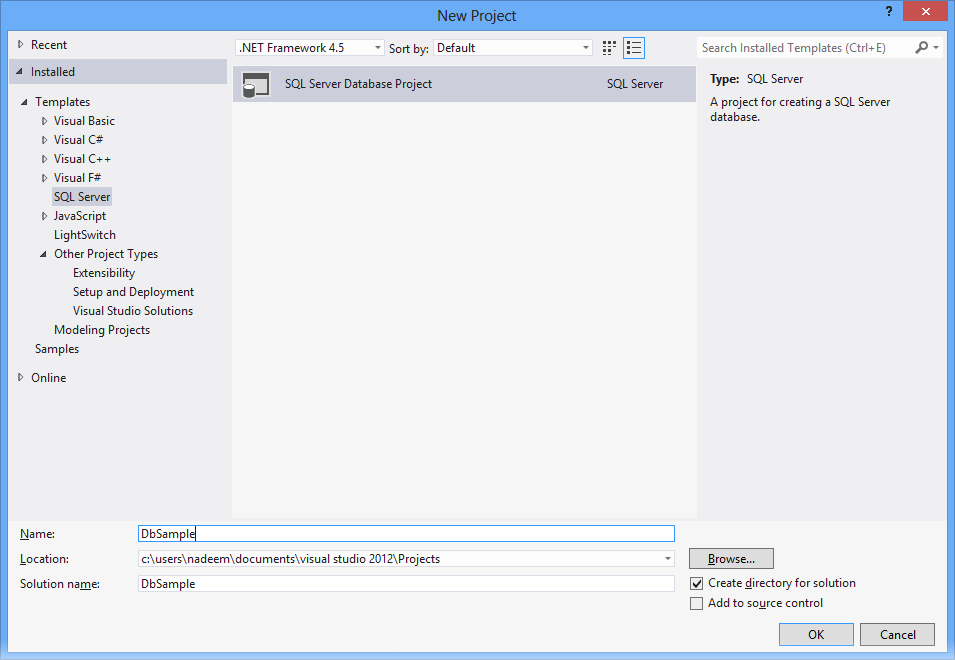
Let’s create a sample database project. This is also known as Disconnected Development mode.
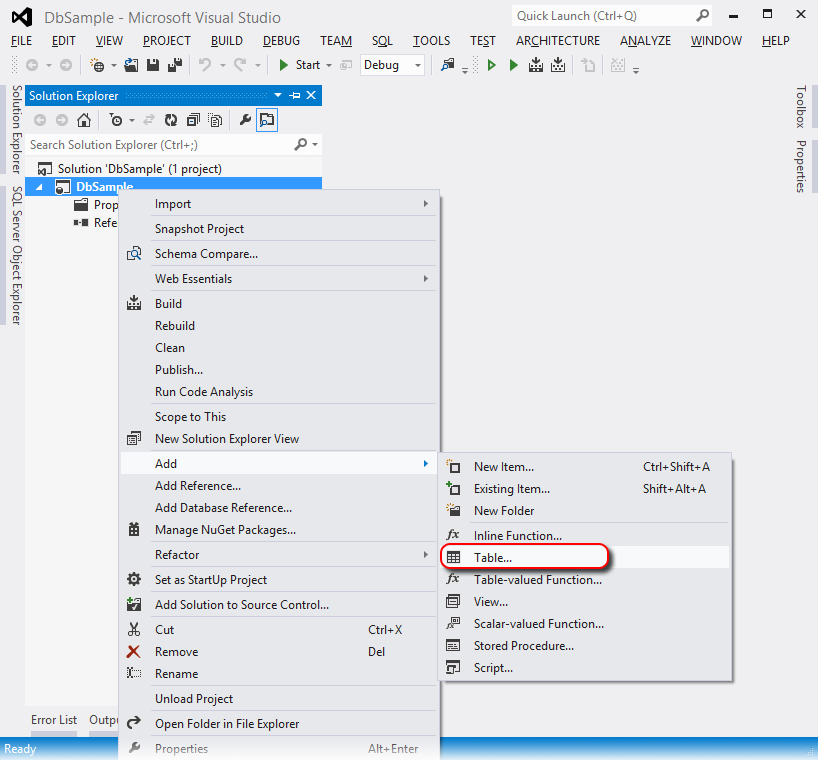
Right click on the project name under Solution Explorer to add a new table.
Name the table Employee. Enter the data like below:
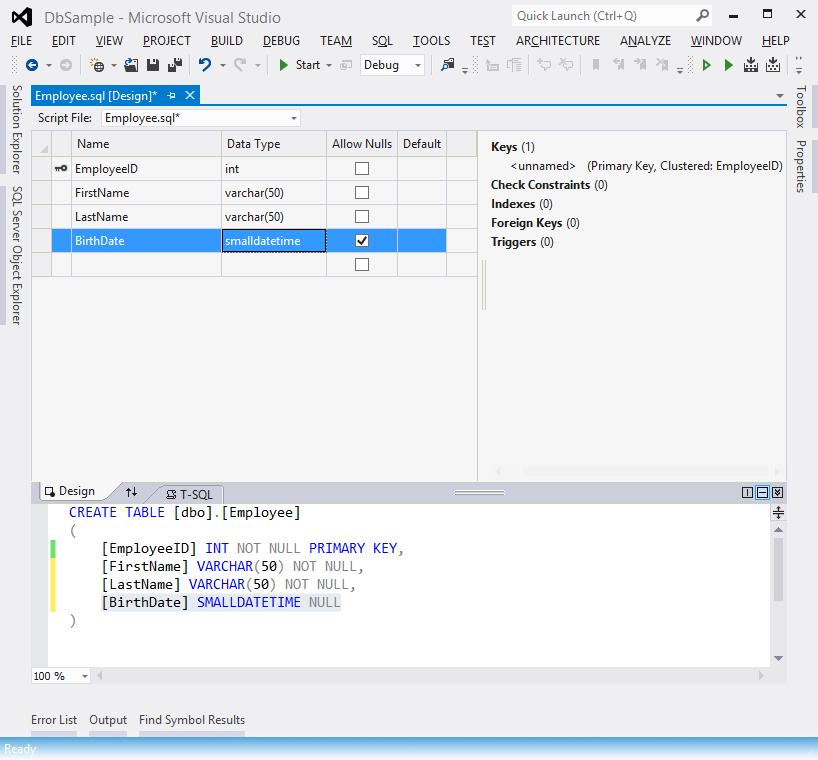
Notice the new SQL pane below. It reflects your changes in the designer window immediately. Save your changes (Ctrl + S)
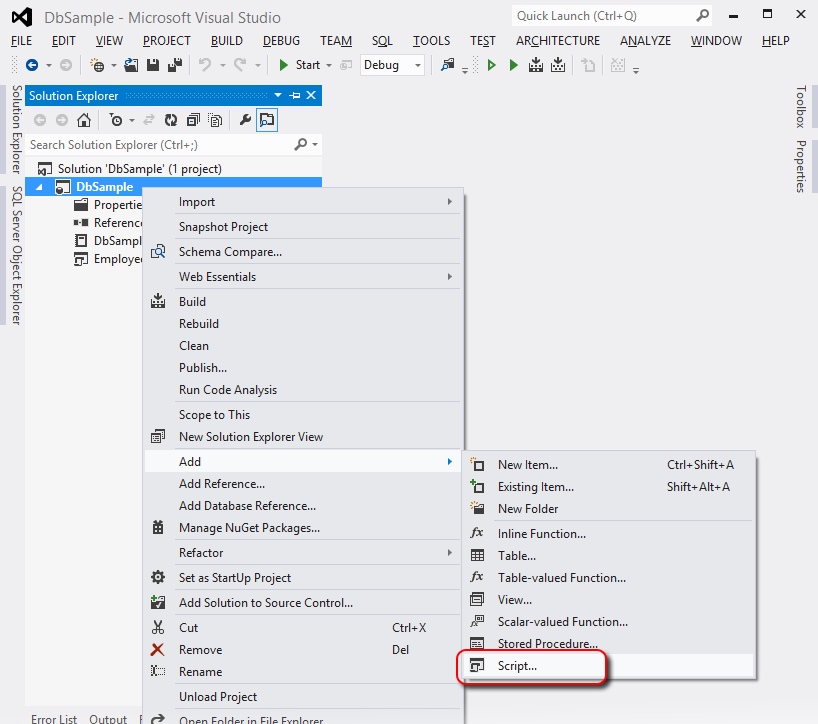
Before we deploy our database, we want to populate our table with some data. Under Solution Explorer, Right click on the project name and choose Add then Script.
Name the table Employee. Enter the data like below:
Type the following SQL code
insert into dbo.Employee (EmployeeID, FirstName, LastName, BirthDate) values
(1, 'Mike', 'Anderson', '06/05/1980'),
(2, 'Adam', 'Sepulveda', '03/12/1987'),
(3, 'Rachel', 'Adams', '01/15/1986');
To publish the database, Right click on the project name and choose Publish
Name the table Employee. Enter the data like below:
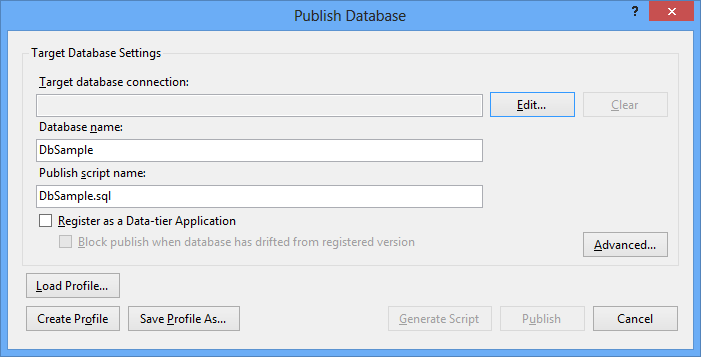
Click Edit to enter the target database connection information.
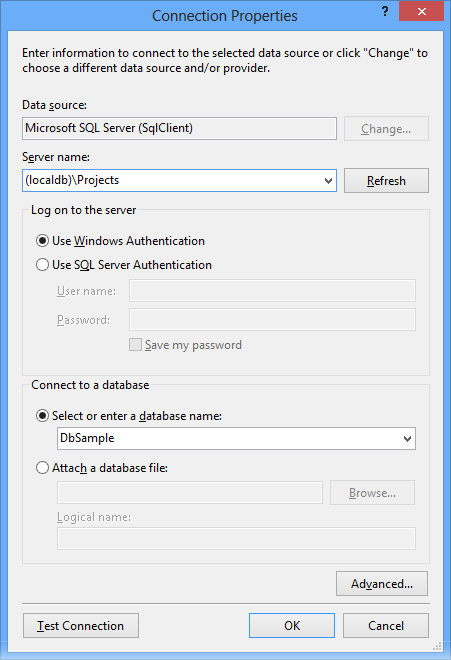
NOTE Your connection string might be different.
SSDT also has a new tool called SQL Server Object Explorer that resembles Server Explorer. This is also known as Connected development mode. Here is a comparison
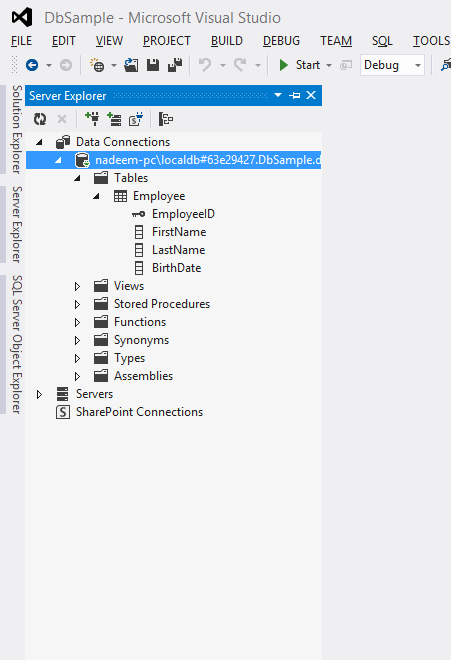
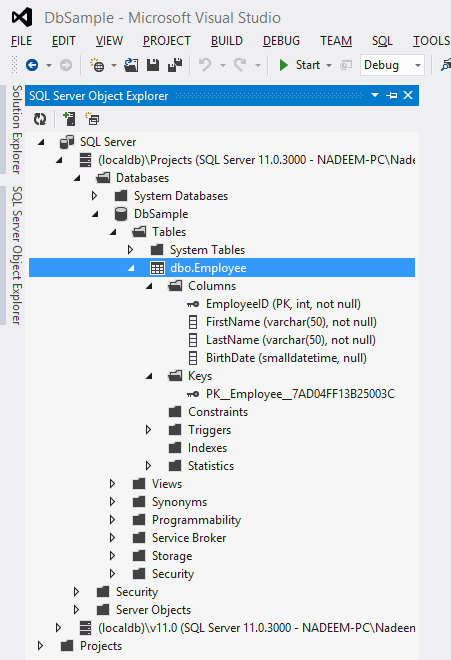
You can do many things in this window like adding, dropping, or renaming objects. I personally find that the new tool, SQL Server Object Explorer, has richer features than Server Explorer.
Anyway, to edit or view the table data, Right click on the table name under SQL Server Object Explorer and choose View Data.
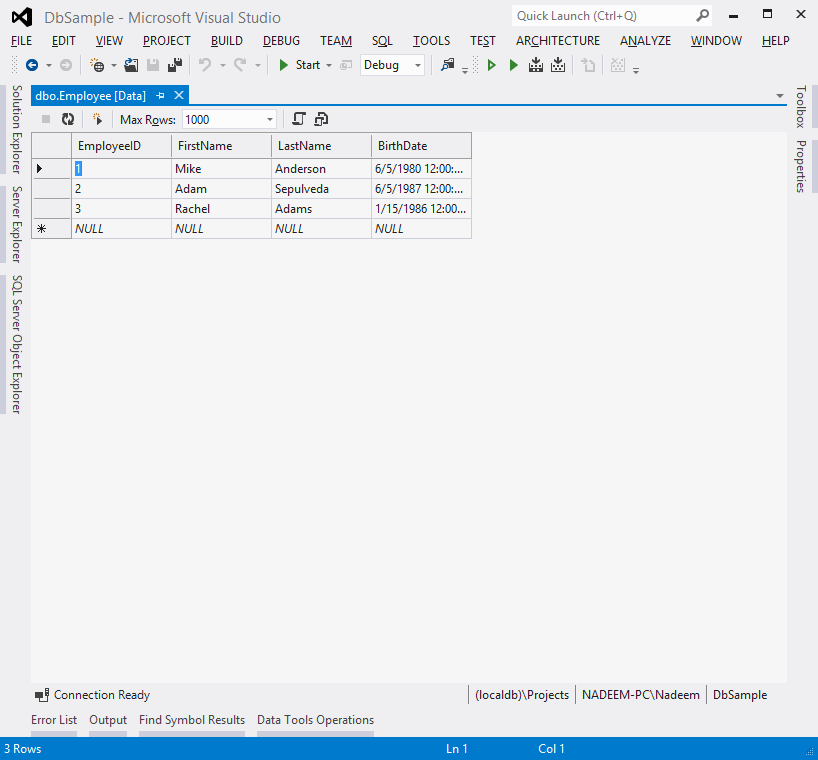
Note there are two buttons next to the Max rows combo box. Click on the first one, and it will export your table data as SQL statements into a new window. The other button will export it to a file instead.
Obviously, SSDT has a lot more features to cover. You can learn more about them at http://msdn.microsoft.com/en-us/library/hh272686%28v=vs.103%29.aspx