ASP.NET MVC 5 Internationalization
14 Jan 2011Introduction
If your website targets users from different parts of the world, these users might like to see your website content in their own language. Creating a multilingual website is not an easy task, but it will certainly allow your site to reach more audience. Fortunately, the .NET Framework already has components that support different languages and cultures.
We will build an ASP.NET MVC 5 web application that contains the following features:
- It can display contents in different languages.
- It autodetects the language from the user’s browser.
- It allows the user to override the language of their browser.
Globalization and Localization in ASP.NET
Internationalization involves Globalization and Localization. Globalization is the process of designing applications that support different cultures. Localization is the process of customizing an application for a given culture.
The format for the culture name is <languagecode2>-<country/regioncode2>, where <languagecode2> is the language code and <country/regioncode2> is the subculture code. Examples include es-CL for Spanish (Chile) and en-US for English (United States).
Anyway, Internationalization is often abbreviated to “I18N”. The abbreviation takes the first and last letters and the number of letters between them, so 18 stands for the number of letters between the first “I” and the last “N”. The same applies to Globalization (G11N), and Localization (L10N).
ASP.NET keeps track of two culture values, the Culture and UICulture. The culture value determines the results of culture-dependent functions, such as the date, number, and currency formatting. The UICulture determines which resources are to be loaded for the page by the ResourceManager. The ResourceManager simply looks up culture-specific resources that is determined by CurrentUICulture. Every thread in .NET has CurrentCulture and CurrentUICulture objects. So ASP.NET inspects these values when rendering culture-dependent functions. For example, if current thread’s culture (CurrentCulture) is set to “en-US” (English, United States), DateTime.Now.ToLongDateString() shows “Saturday, January 08, 2011”, but if CurrentCulture is set to “es-CL” (Spanish, Chile) the result will be “sábado, 08 de enero de 2011”.
Now, let’s review the terms used so far:
- Globalization (G11N): The process of making an application support different languages and regions.
- Localization (L10N): The process of customizing an application for a given language and region.
- Internationalization (I18N): Describes both globalization and localization.
- Culture: It is a language and, optionally, a region.
- Locale: A locale is the same as a culture.
- Neutral culture: A culture that has a specified language, but not a region. (e.g. “en”, “es”)
- Specific culture: A culture that has a specified language and region. (e.g. “en-US”, “en-GB”, “es-CL”)
Why do we need a region? Isn’t a language alone enough?
You might not need a region at all. It is true that English in the United States is not the same as English in the United Kingdom but if your application just shows English text readable to people from these English-speaking countries, you will not need a region. The problem arises when you need to deal with numbers, dates, and currencies. For example, compare the following output for two different Spanish-speaking regions (Chile, Mexico):
int value = 5600;

Thread.CurrentThread.CurrentCulture = new System.Globalization.CultureInfo("es-CL");
Console.WriteLine(DateTime.Now.ToShortDateString());
Console.WriteLine(value.ToString("c"));

Thread.CurrentThread.CurrentCulture = new System.Globalization.CultureInfo("es-MX");
Console.WriteLine(DateTime.Now.ToShortDateString());
Console.WriteLine(value.ToString("c"));

// Output
26-07-2011 // Date in es-CL, Spanish (Chile)
$5.600,00 // Currency in es-CL, Spanish (Chile)

26/07/2011 // Date in es-MX, Spanish (Mexico)
$5,600.00 // Currency in es-MX, Spanish (Mexico)
You can notice the difference in date and currency format. The decimal separator in each region is different and can confuse people in the other region. If a Mexican user types one thousand in their culture “1,000”, it will be interpreted as 1 (one) in a Chilean culture website. We mainly need regions for this type of reasons and not much for the language itself.
How to Support Different Languages in ASP.NET MVC
There are two ways to incorporate different languages and cultures in ASP.NET MVC:
- By using resource strings in all our site views.
- By using different set of views for every language and locale.
- By mixing between 1 and 2
Which one is the best?
It is a matter of convenience. Some people prefer to use a single view for all languages because it is more maintainable. While others think replacing views content with code like “@Resources.Something” might clutter the views and will become unreadable. Some project requirements force developers to implement different views per language. But sometimes you have no choice where layout has to be different like right-to-left languages. Even if you set dir=”rtl”, this may not be enough in real applications unless the project’s UI layout is really simple. Perhaps, a mix of the two is the best. Anyway, for this example, it makes sense to use resources since we won’t have any issue with the layout for the Spanish, English, and Arabic languages that we will use.
How can ASP.NET guess the user’s language?
On each HTTP request, there is a header field called Accept-Language which determines which languages the user’s browser supports:
Accept-Language: en-us,en;q=0.5
This means that my browser prefers English (United States), but it can accept other types of English. The “q” parameter indicates an estimate of the user’s preference for that language. You can control the list of languages using your web browser.
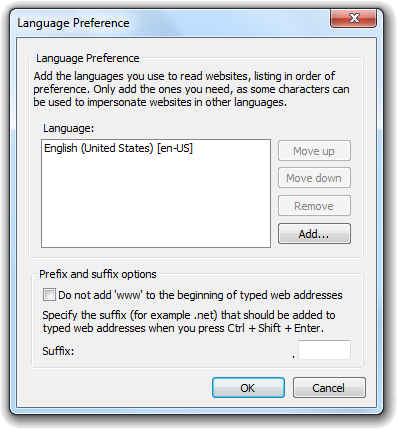
IE
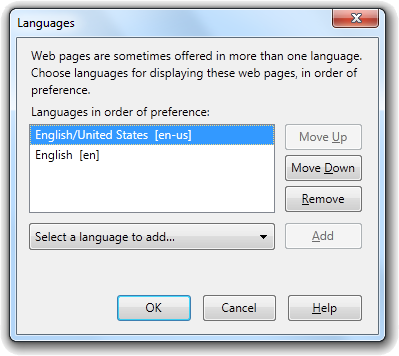
FireFox
Globalizing our Web Site
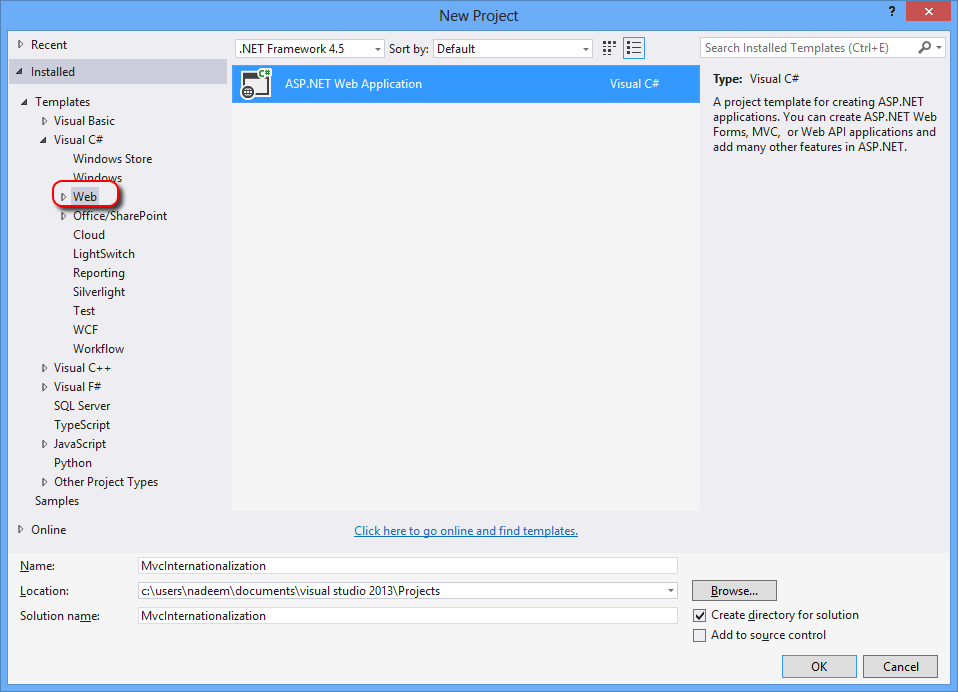
We will create a new ASP.NET MVC web application and globalize it step by step.
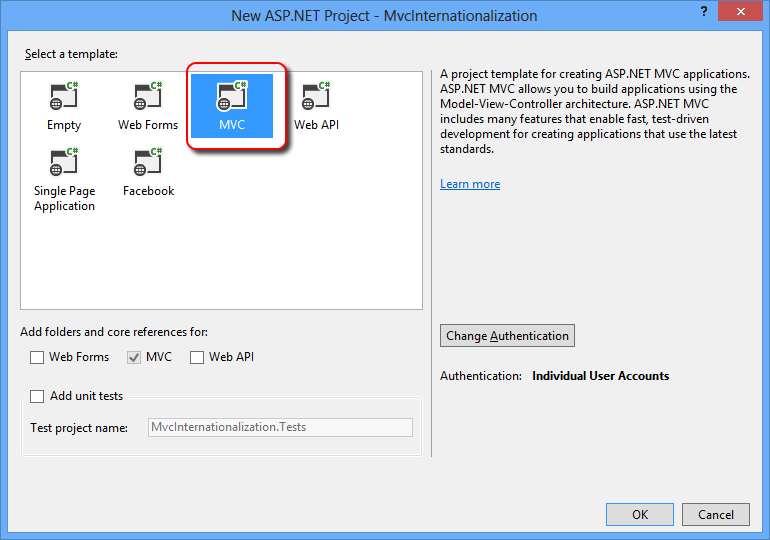
Click “File->New Project” menu command within Visual Studio to create a new ASP.NET MVC 5 Project. We’ll create a new project using the “MVC” template.
Creating the Model
We’ll need a model to create our web application. Add a class named “Person” to the “Models” folder:
public class Person
{
        public string FirstName { get; set; }
        public string LastName { get; set; }
        public int Age { get; set; }
        public string Email { get; set; }
        public string Biography { get; set; }
}
Internationalizing Validation Messages
Our model presented above contains no validation logic, and this is not the case in normal applications nowadays. We can use data annotation attributes to add some validation logic to our model. However, in order to globalize validation messages, we need to specify a few extra parameters. The “ErrorMessageResourceType” indicates the type of resource to look up the error message. “ErrorMessageResourceName” indicates the resource name to lookup the error message. Resource manager will pick the correct resource file based on the current culture.
Now modify the “Person” class and add the following attributes:
public class Person
{
    [Display(Name = "FirstName", ResourceType = typeof(Resources.Resources))]
    [Required(ErrorMessageResourceType = typeof(Resources.Resources),
              ErrorMessageResourceName = "FirstNameRequired")]
    [StringLength(50, ErrorMessageResourceType = typeof(Resources.Resources),
                      ErrorMessageResourceName = "FirstNameLong")]
    public string FirstName { get; set; }
    [Display(Name = "LastName", ResourceType = typeof(Resources.Resources))]
    [Required(ErrorMessageResourceType = typeof(Resources.Resources),
              ErrorMessageResourceName = "LastNameRequired")]
    [StringLength(50, ErrorMessageResourceType = typeof(Resources.Resources),
                      ErrorMessageResourceName = "LastNameLong")]
    public string LastName { get; set; }
    [Display(Name = "Age", ResourceType = typeof(Resources.Resources))]
    [Required(ErrorMessageResourceType = typeof(Resources.Resources),
              ErrorMessageResourceName = "AgeRequired")]
    [Range(0, 130, ErrorMessageResourceType = typeof(Resources.Resources),
                   ErrorMessageResourceName = "AgeRange")]
    public int Age { get; set; }
    [Display(Name = "Email", ResourceType = typeof(Resources.Resources))]
    [Required(ErrorMessageResourceType = typeof(Resources.Resources),
              ErrorMessageResourceName = "EmailRequired")]
    [RegularExpression(".+@.+\\..+", ErrorMessageResourceType = typeof(Resources.Resources),
                                     ErrorMessageResourceName = "EmailInvalid")]
    public string Email { get; set; }
    [Display(Name = "Biography", ResourceType = typeof(Resources.Resources))]
    public string Biography { get; set; }
}
Localizing Data Annotations Validation Messages
Because we need to perform data validation on our model using Data Annotations, we will have to add translated resource strings for every culture our site will support. In this case, English, Spanish, and Arabic.
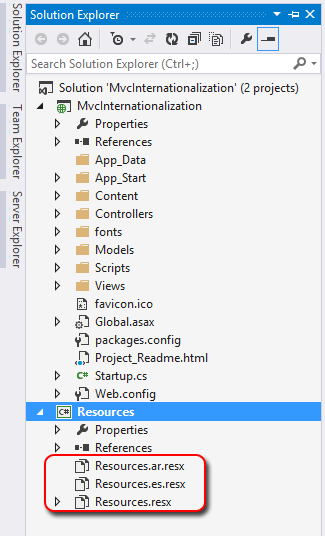
We will store resource files in a separate assembly, so we can reference them in other project types in the future.
Right click on the Solution and then choose the “Add->New Project” context menu command. Choose “Class Library” project type and name it “Resources”.
Now right click on “Resources” project and then choose “Add->New Item” context menu command. Choose “Resource File” and name it “Resources.resx”. This will be our default culture (en-US) since it has no special endings. Add the following names and values to the file like below:
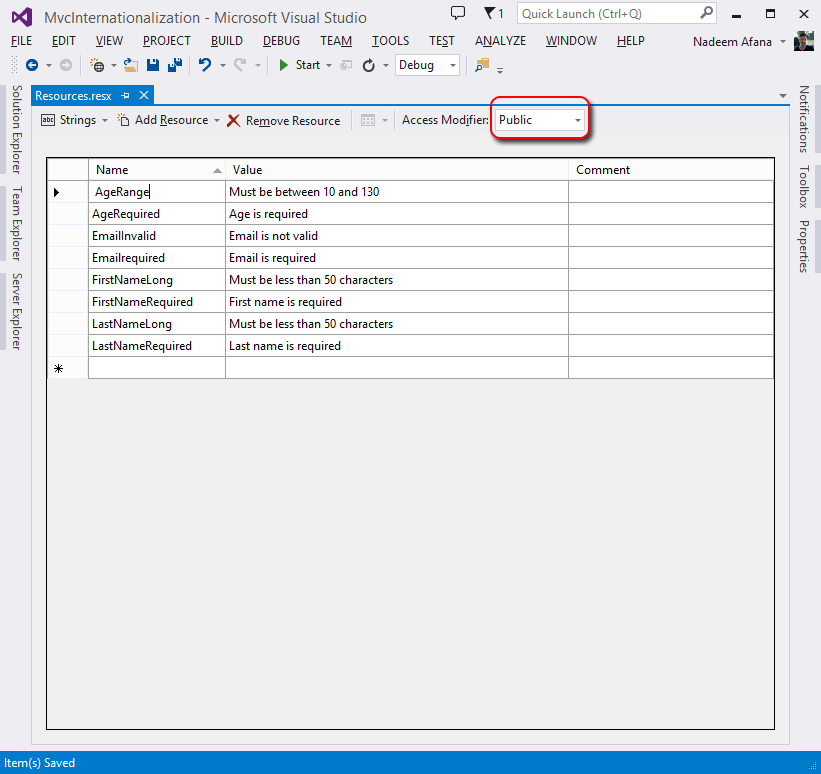
Remember to mark the resource’s access modifier property to “public”, so it will be accessible from other projects.
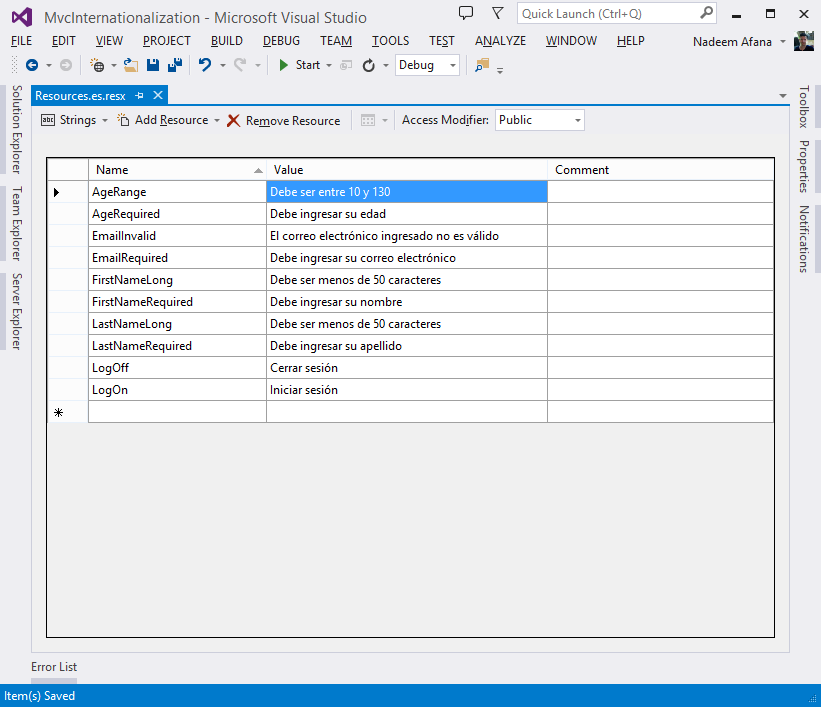
Now create a new resource file and name it “Resources.es.resx” and add the following names and values like below:
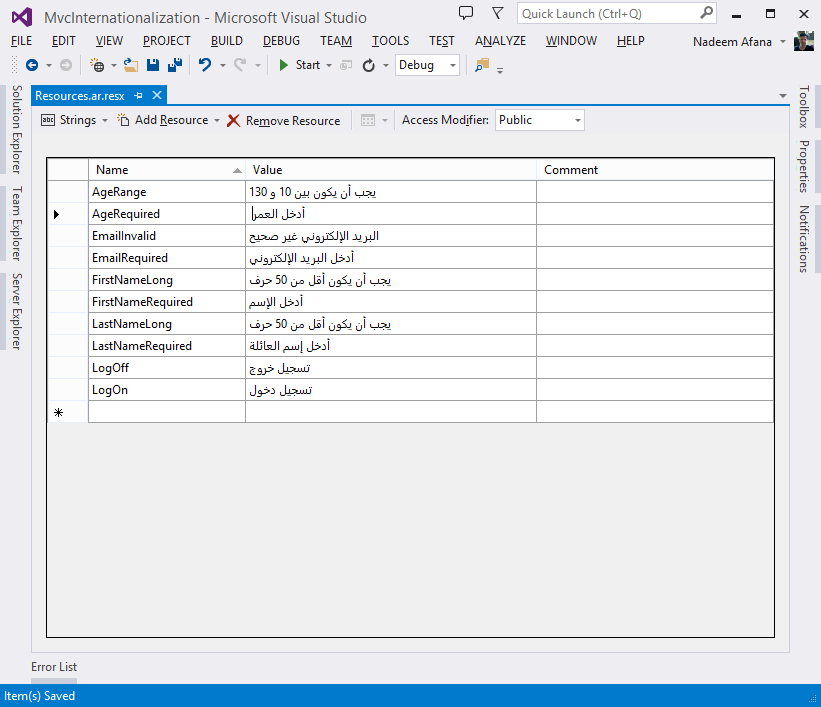
Now, do the same for the Arabic version. You may not be able to enter the correct strings by keyboard because your OS may not be configured to accept Arabic. However, you can download the files from the link at the top. Anyway, the resource file is included for reference:
We need to reference “Resources” project from our web application, so that we can read the resource strings right from our web site. Right click on “References” under our web project “MvcInternationalization”, and choose the “Resources” project from Projects tab.
Views
We need to extract the English text from all the views and move it to the resource files. Here is a trick, instead of typing the namespace name each time (e.g. “@Resources.Resources.LogOn “), we can add this namespace to the views Web.config and type “@Resources.LogOn” instead. Open the Web.config file under the views folder.

Determining Culture
There is a header field called “Accept-Language” that the browser sends on every request. This field contains a list of culture names (language-country) that the user has configured in their browser. The problem is that this culture may not reflect the real user’s preferred language, such as a computer in a public place. We should allow the user to choose a language explicitly and allow them even to change it. In order to do this sort of things, we need to store the user’s preferred language in a store, which can be perfectly a cookie. We will create a base controller that inspects the cookie contents first, if there is no cookie, we will use the “Accept-Language” field sent by their browser. Create a controller and name it “BaseController” like below:
public class BaseController : Controller
{
    protected override IAsyncResult BeginExecuteCore(AsyncCallback callback, object state)
    {
        string cultureName = null;

        // Attempt to read the culture cookie from Request
        HttpCookie cultureCookie = Request.Cookies["_culture"];
        if (cultureCookie != null)
            cultureName = cultureCookie.Value;
        else
            cultureName = Request.UserLanguages != null && Request.UserLanguages.Length > 0 ?
                    Request.UserLanguages[0] :  // obtain it from HTTP header AcceptLanguages
                    null;
        // Validate culture name
        cultureName = CultureHelper.GetImplementedCulture(cultureName); // This is safe

        // Modify current thread's cultures
        Thread.CurrentThread.CurrentCulture = new System.Globalization.CultureInfo(cultureName);
        Thread.CurrentThread.CurrentUICulture = Thread.CurrentThread.CurrentCulture;

        return base.BeginExecuteCore(callback, state);
    }
}
Make sure all controllers in this project inherit from this BaseController. The base controller checks if the cookie exists, and sets the current thread cultures to that cookie value. Of course, because cookie content can be manipulated on the client side, we should always validate its value using a helper class called “CultureHelper”. If the culture name is not valid, the helper class returns the default culture.
CultureHelper Class
The CultureHelper is basically a utility that allows us to store culture names we are implementing in our site:
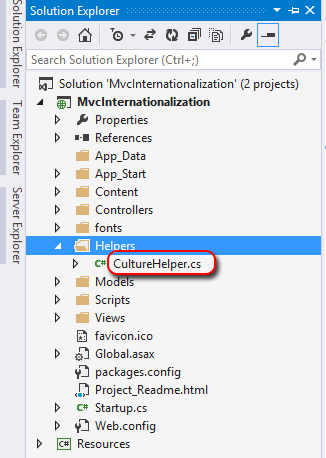
public static class CultureHelper
{
    // Valid cultures
    private static readonly List<string> _validCultures = new List<string> { "af", "af-ZA", "sq", "sq-AL", "gsw-FR", "am-ET", "ar", "ar-DZ", "ar-BH", "ar-EG", "ar-IQ", "ar-JO", "ar-KW", "ar-LB", "ar-LY", "ar-MA", "ar-OM", "ar-QA", "ar-SA", "ar-SY", "ar-TN", "ar-AE", "ar-YE", "hy", "hy-AM", "as-IN", "az", "az-Cyrl-AZ", "az-Latn-AZ", "ba-RU", "eu", "eu-ES", "be", "be-BY", "bn-BD", "bn-IN", "bs-Cyrl-BA", "bs-Latn-BA", "br-FR", "bg", "bg-BG", "ca", "ca-ES", "zh-HK", "zh-MO", "zh-CN", "zh-Hans", "zh-SG", "zh-TW", "zh-Hant", "co-FR", "hr", "hr-HR", "hr-BA", "cs", "cs-CZ", "da", "da-DK", "prs-AF", "div", "div-MV", "nl", "nl-BE", "nl-NL", "en", "en-AU", "en-BZ", "en-CA", "en-029", "en-IN", "en-IE", "en-JM", "en-MY", "en-NZ", "en-PH", "en-SG", "en-ZA", "en-TT", "en-GB", "en-US", "en-ZW", "et", "et-EE", "fo", "fo-FO", "fil-PH", "fi", "fi-FI", "fr", "fr-BE", "fr-CA", "fr-FR", "fr-LU", "fr-MC", "fr-CH", "fy-NL", "gl", "gl-ES", "ka", "ka-GE", "de", "de-AT", "de-DE", "de-LI", "de-LU", "de-CH", "el", "el-GR", "kl-GL", "gu", "gu-IN", "ha-Latn-NG", "he", "he-IL", "hi", "hi-IN", "hu", "hu-HU", "is", "is-IS", "ig-NG", "id", "id-ID", "iu-Latn-CA", "iu-Cans-CA", "ga-IE", "xh-ZA", "zu-ZA", "it", "it-IT", "it-CH", "ja", "ja-JP", "kn", "kn-IN", "kk", "kk-KZ", "km-KH", "qut-GT", "rw-RW", "sw", "sw-KE", "kok", "kok-IN", "ko", "ko-KR", "ky", "ky-KG", "lo-LA", "lv", "lv-LV", "lt", "lt-LT", "wee-DE", "lb-LU", "mk", "mk-MK", "ms", "ms-BN", "ms-MY", "ml-IN", "mt-MT", "mi-NZ", "arn-CL", "mr", "mr-IN", "moh-CA", "mn", "mn-MN", "mn-Mong-CN", "ne-NP", "no", "nb-NO", "nn-NO", "oc-FR", "or-IN", "ps-AF", "fa", "fa-IR", "pl", "pl-PL", "pt", "pt-BR", "pt-PT", "pa", "pa-IN", "quz-BO", "quz-EC", "quz-PE", "ro", "ro-RO", "rm-CH", "ru", "ru-RU", "smn-FI", "smj-NO", "smj-SE", "se-FI", "se-NO", "se-SE", "sms-FI", "sma-NO", "sma-SE", "sa", "sa-IN", "sr", "sr-Cyrl-BA", "sr-Cyrl-SP", "sr-Latn-BA", "sr-Latn-SP", "nso-ZA", "tn-ZA", "si-LK", "sk", "sk-SK", "sl", "sl-SI", "es", "es-AR", "es-BO", "es-CL", "es-CO", "es-CR", "es-DO", "es-EC", "es-SV", "es-GT", "es-HN", "es-MX", "es-NI", "es-PA", "es-PY", "es-PE", "es-PR", "es-ES", "es-US", "es-UY", "es-VE", "sv", "sv-FI", "sv-SE", "syr", "syr-SY", "tg-Cyrl-TJ", "tzm-Latn-DZ", "ta", "ta-IN", "tt", "tt-RU", "te", "te-IN", "th", "th-TH", "bo-CN", "tr", "tr-TR", "tk-TM", "ug-CN", "uk", "uk-UA", "wen-DE", "ur", "ur-PK", "uz", "uz-Cyrl-UZ", "uz-Latn-UZ", "vi", "vi-VN", "cy-GB", "wo-SN", "sah-RU", "ii-CN", "yo-NG" };
    // Include ONLY cultures you are implementing
    private static readonly List<string> _cultures = new List<string> {
        "en-US",  // first culture is the DEFAULT
        "es", // Spanish NEUTRAL culture
        "ar"  // Arabic NEUTRAL culture

    };
    /// <summary>
    /// Returns true if the language is a right-to-left language. Otherwise, false.
    /// </summary>
    public static bool IsRighToLeft()
    {
        return System.Threading.Thread.CurrentThread.CurrentCulture.TextInfo.IsRightToLeft;

    }
    /// <summary>
    /// Returns a valid culture name based on "name" parameter. If "name" is not valid, it returns the default culture "en-US"
    /// </summary>
    /// <param name="name" />Culture's name (e.g. en-US)</param>
    public static string GetImplementedCulture(string name)
    {
        // make sure it's not null
        if (string.IsNullOrEmpty(name))
            return GetDefaultCulture(); // return Default culture
        // make sure it is a valid culture first
        if (_validCultures.Where(c => c.Equals(name, StringComparison.InvariantCultureIgnoreCase)).Count() == 0)
            return GetDefaultCulture(); // return Default culture if it is invalid
        // if it is implemented, accept it
        if (_cultures.Where(c => c.Equals(name, StringComparison.InvariantCultureIgnoreCase)).Count() > 0)
            return name; // accept it
        // Find a close match. For example, if you have "en-US" defined and the user requests "en-GB",
        // the function will return closes match that is "en-US" because at least the language is the same (ie English)
        var n = GetNeutralCulture(name);
        foreach (var c in _cultures)
            if (c.StartsWith(n))
                return c;
        // else
        // It is not implemented
        return GetDefaultCulture(); // return Default culture as no match found
    }
    /// <summary>
    /// Returns default culture name which is the first name decalared (e.g. en-US)
    /// </summary>
    /// <returns></returns>
    public static string GetDefaultCulture()
    {
        return _cultures[0]; // return Default culture
    }
    public static string GetCurrentCulture()
    {
        return Thread.CurrentThread.CurrentCulture.Name;
    }
    public static string GetCurrentNeutralCulture()
    {
        return GetNeutralCulture(Thread.CurrentThread.CurrentCulture.Name);
    }
    public static string GetNeutralCulture(string name)
    {
        if (!name.Contains("-")) return name;

        return name.Split('-')[0]; // Read first part only. E.g. "en", "es"
    }
}
We should populate “_cultures” manually. The “_cultures” dictionary stores the list of culture names our site supports. The nice part of this utility class is that it serves similar cultures. For example, if a user is visiting our site from the United Kingdom (en-GB), a culture which is not implemented in our site, he or she will see our site in English using “en-US” (English, United States). This way, you don’t have to implement all cultures unless you really care about currency, date format, etc. One important thing to mention is that we added all specific cultures for the Spanish language. For example, we are implementing “es” Spanish in general without any region where a date looks like this “30/07/2011”. Now suppose a nerd is coming from Chile (es-CL), it would be very nice display dates in their culture format (30-07-2011) instead of the neutral one. It does not matter if we don’t have a resource file for any of these cultures. ResourceManager can pick a neutral culture when it cannot find a specific culture file, this automatic mechanism is called fallback.
Controllers
Visual Studio has created a controller named “HomeCotnroller” for us, so we’ll use it for simplicity. Modify the “HomeController.cs” so that it looks like below:
public class HomeController : BaseController
{
    [HttpGet]
    public ActionResult Index()
    {
        return View();
    }
    [HttpPost]
    public ActionResult Index(Person per)
    {
        return View();
    }
    public ActionResult SetCulture(string culture)
    {
        // Validate input
        culture = CultureHelper.GetImplementedCulture(culture);
        // Save culture in a cookie
        HttpCookie cookie = Request.Cookies["_culture"];
        if (cookie != null)
            cookie.Value = culture;   // update cookie value
        else
        {
            cookie = new HttpCookie("_culture");
            cookie.Value = culture;
            cookie.Expires = DateTime.Now.AddYears(1);
        }
        Response.Cookies.Add(cookie);
        return RedirectToAction("Index");
    }

}
The “SetCulture” action allows the user to change their current culture and stores it in a cookie called “_culture”. We are not restricted to cookies, we could instead save the culture name in Session or elsewhere, but cookies are really lightweight since they do not take any type of space on server side.
Creating a View Template
Now we will implement the View associated with the HomeController’s Index action. First delete the existing Index.cshtml file under “Views/Home” folder. Now to implement the view right-click within the “HomeController.Index()” method and select the “Add View” command to create a view template for our home page:
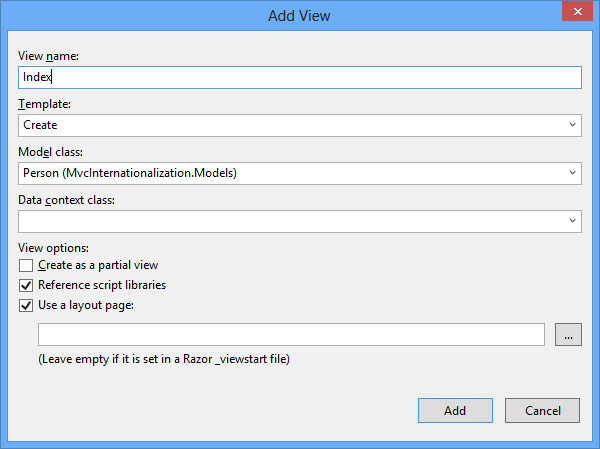
Click OK and replace the existing view if any. When we click the “Add” button, a view template of our “Create” view (which renders the form) is created. Modify it so it looks like below:
@model MvcInternationalization.Models.Person
@{
    ViewBag.Title = Resources.AddPerson;
    var culture = System.Threading.Thread.CurrentThread.CurrentUICulture.Name.ToLowerInvariant();
}
@helper selected(string c, string culture)
{
    if (c == culture)
    {
        @:checked="checked"
    }
}
<h2>@Resources.AddPerson</h2>
@using(Html.BeginForm("SetCulture", "Home"))
{
    <fieldset>
        <legend>@Resources.ChooseYourLanguage</legend>
        <div class="control-group">
            <div class="controls">
                <label for="en-us">
                    <input name="culture" id="en-us" value="en-us" type="radio" @selected("en-us", culture) /> English
                </label>
            </div>
        </div>
        <div class="control-group">
            <div class="controls">
                <label for="es">
                    <input name="culture" id="es" value="es" type="radio" @selected("es", culture) /> Español
                </label>
            </div>
        </div>
        <div class="control-group">
            <div class="controls">
                <label for="ar">
                    <input name="culture" id="ar" value="ar" type="radio" @selected("ar", culture) /> العربية
                </label>
            </div>
        </div>

    </fieldset>


}
@using (Html.BeginForm())
{
    @Html.AntiForgeryToken()

    <div class="form-horizontal">
        <hr />
        @Html.ValidationSummary(true)
        <div class="form-group">
            @Html.LabelFor(model => model.FirstName, new { @class = "control-label col-md-2" })
            <div class="col-md-10">
                @Html.EditorFor(model => model.FirstName)
                @Html.ValidationMessageFor(model => model.FirstName)
            </div>
        </div>
        <div class="form-group">
            @Html.LabelFor(model => model.LastName, new { @class = "control-label col-md-2" })
            <div class="col-md-10">
                @Html.EditorFor(model => model.LastName)
                @Html.ValidationMessageFor(model => model.LastName)
            </div>
        </div>
        <div class="form-group">
            @Html.LabelFor(model => model.Age, new { @class = "control-label col-md-2" })
            <div class="col-md-10">
                @Html.EditorFor(model => model.Age)
                @Html.ValidationMessageFor(model => model.Age)
            </div>
        </div>
        <div class="form-group">
            @Html.LabelFor(model => model.Email, new { @class = "control-label col-md-2" })
            <div class="col-md-10">
                @Html.EditorFor(model => model.Email)
                @Html.ValidationMessageFor(model => model.Email)
            </div>
        </div>
        <div class="form-group">
            @Html.LabelFor(model => model.Biography, new { @class = "control-label col-md-2" })
            <div class="col-md-10">
                @Html.EditorFor(model => model.Biography)
                @Html.ValidationMessageFor(model => model.Biography)
            </div>
        </div>
        <div class="form-group">
            <div class="col-md-offset-2 col-md-10">
                <input type="submit" value="@Resources.Create" class="btn btn-default" />
            </div>
        </div>
    </div>
}
@section Scripts {
    @Scripts.Render("~/bundles/jqueryval")
    <script type="text/javascript">
        (function ($) {
            $("input[type = 'radio']").click(function () {
                $(this).parents("form").submit(); // post form
            });

        })(jQuery);
    </script>
}
The javascript code simply post back the form to set the culture. The “selected” helper is used to mark the appropriate culture radio button as checked.
Of course, we should not forget about partial views too
@using Microsoft.AspNet.Identity
@if (Request.IsAuthenticated)
{
    using (Html.BeginForm("LogOff", "Account", FormMethod.Post, new { id = "logoutForm", @class = "navbar-right" }))
    {
    @Html.AntiForgeryToken()
    <ul class="nav navbar-nav navbar-right">
        <li>
            @Html.ActionLink(User.Identity.GetUserName(), "Manage", "Account", routeValues: null, htmlAttributes: new { title = "Manage" })
        </li>
        <li><a href="javascript:document.getElementById('logoutForm').submit()">@Resources.LogOff</a></li>
    </ul>
    }
}
else
{
    <ul class="nav navbar-nav navbar-right">
        <li>@Html.ActionLink(Resources.Register, "Register", "Account", routeValues: null, htmlAttributes: new { id = "registerLink" })</li>
        <li>@Html.ActionLink(Resources.LogOn, "Login", "Account", routeValues: null, htmlAttributes: new { id = "loginLink" })</li>
    </ul>
}
Left-to-right or Right-to-left
HTML supports rtl languages too, so we need to make sure our main HTML tag has the appropriate direction. Modify the _Layout.cshtml file to look like the following:
 <!DOCTYPE html>

<html lang="@CultureHelper.GetCurrentNeutralCulture()" dir="@(CultureHelper.IsRighToLeft() ? "rtl" : "ltr")">
<head>
    <meta charset="utf-8" />
    <meta name="viewport" content="width=device-width, initial-scale=1.0">
    <title>@ViewBag.Title - ASP.NET MVC Internationalization</title>
    @Styles.Render("~/Content/css" + (CultureHelper.IsRighToLeft() ? "-rtl" : ""))
    @Scripts.Render("~/bundles/modernizr")
</head>
<body>
    <div class="navbar navbar-inverse navbar-fixed-top">
        <div class="container">
            <div class="navbar-header">
                <button type="button" class="navbar-toggle" data-toggle="collapse" data-target=".navbar-collapse">
                    <span class="icon-bar"></span>
                    <span class="icon-bar"></span>
                    <span class="icon-bar"></span>
                </button>
                @Html.ActionLink("ASP.NET MVC Internationalization", "Index", "Home", null, new { @class = "navbar-brand" })
            </div>
            <div class="navbar-collapse collapse">
                <ul class="nav navbar-nav">
                </ul>
                @Html.Partial("_LoginPartial")
            </div>
        </div>
    </div>
    <div class="container body-content">
        @RenderBody()
        <hr />
        <footer>
            <p>@DateTime.Now</p>
        </footer>
    </div>
    @Scripts.Render("~/bundles/jquery")
    @Scripts.Render("~/bundles/bootstrap" + (CultureHelper.IsRighToLeft() ? "-rtl" : ""))
    @RenderSection("scripts", required: false)
</body>
</html>
Now we need to provide basically two sets of CSS and JS files: One for left-to-right languages and one for right-to-left languages. Because MVC default template is using Bootstrap, we need to install the RTL version of bootstrap files. For this, open the package manager console (aka Nuget) by choosing Tools -> Library Package Manager -> Package Manager Console and type:
Install-Package Twitter.Bootstrap.RTL
Make sure you have the two files bootstrap-rtl.js and bootstrap-rtl.css
We need to create two bundles: one for RTL and one for LTR. Modify the file BundleConfig.cs and add the following:
bundles.Add(new ScriptBundle("~/bundles/bootstrap-rtl").Include(
           "~/Scripts/bootstrap-rtl.js",
           "~/Scripts/respond.js"));

 bundles.Add(new StyleBundle("~/Content/css-rtl").Include(
           "~/Content/bootstrap-rtl.css",
           "~/Content/site.css"));
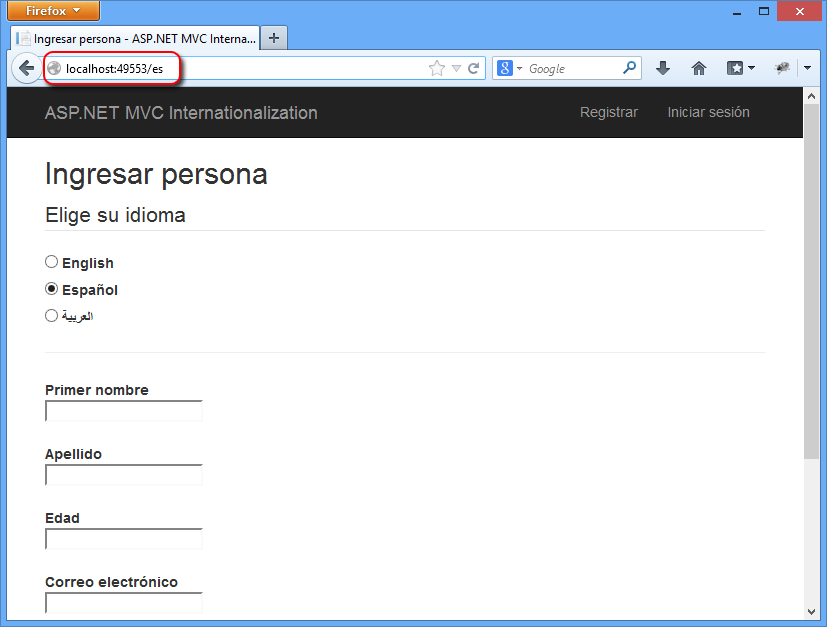
Try It Out
Run the website now. Notice that client side validation is working nicely. Click on radio buttons to switch between cultures, and notice how right-to-left language is showing correctly. Using separate views allowed us to control how to position elements, and have made our views clean and readable.
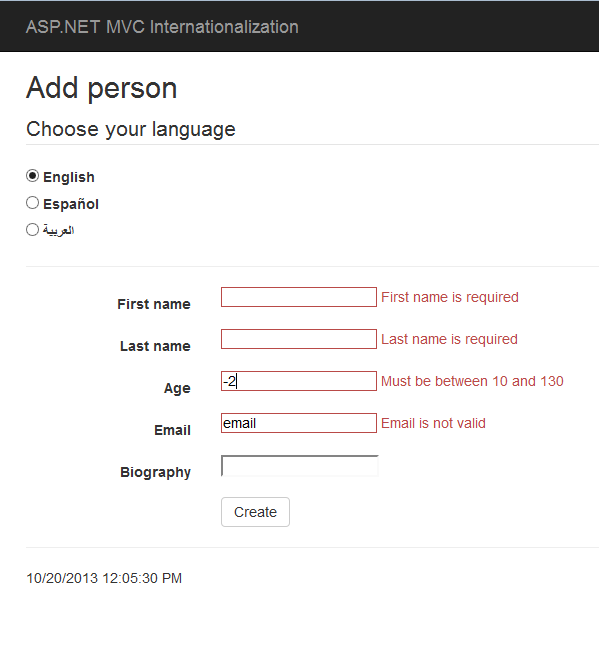
English
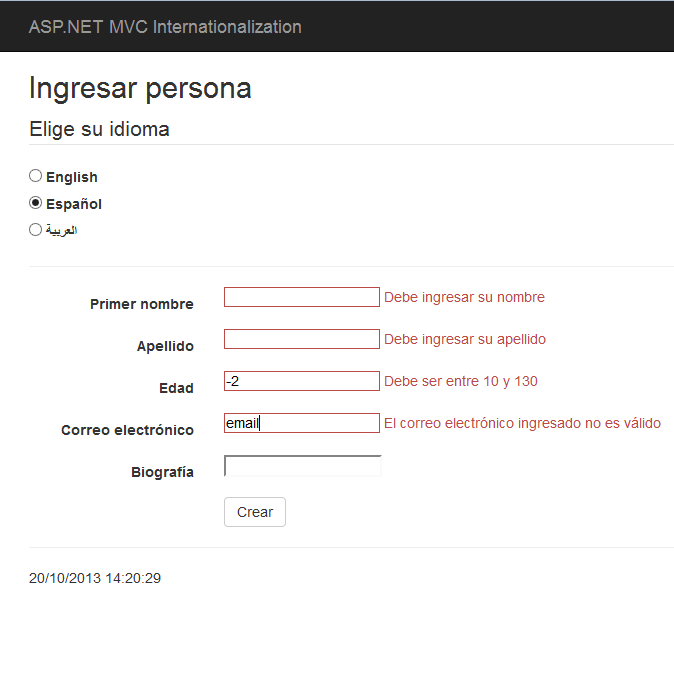
Spanish
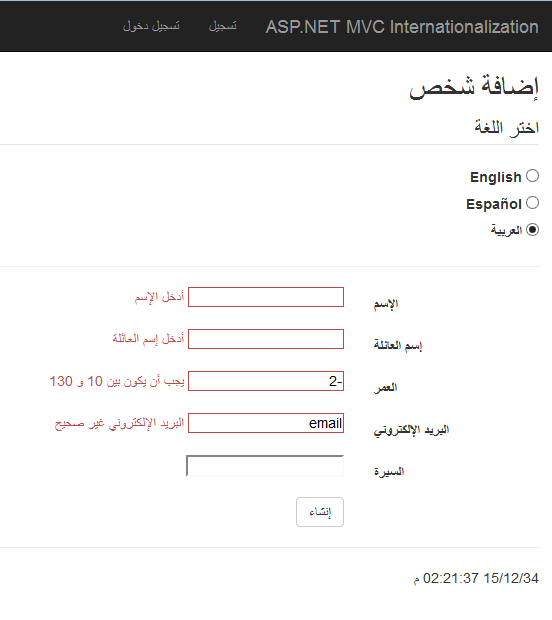
Arabic
How to store culture in the URL instead of a cookie?
There can be different reasons why you want the culture to be part of your website url (such as search engine indexing). Anyway. First let’s fist define the culture to be part of our routes. Edit RouteConfig.cs like below:
public static void RegisterRoutes(RouteCollection routes)
{
    routes.IgnoreRoute("{resource}.axd/{*pathInfo}");
    routes.MapRoute(
        name: "Default",
        url: "{culture}/{controller}/{action}/{id}",
        defaults: new {culture = CultureHelper.GetDefaultCulture(), controller = "Home", action = "Index", id = UrlParameter.Optional }
    );
}
Notice the we used the default culture in case it is missing. Now modify the base controller:
protected override IAsyncResult BeginExecuteCore(AsyncCallback callback, object state)
{
    string cultureName = RouteData.Values["culture"] as string;

    // Attempt to read the culture cookie from Request
    if (cultureName == null)
        cultureName = Request.UserLanguages != null && Request.UserLanguages.Length > 0 ? Request.UserLanguages[0] : null; // obtain it from HTTP header AcceptLanguages

    // Validate culture name
    cultureName = CultureHelper.GetImplementedCulture(cultureName); // This is safe


    if (RouteData.Values["culture"] as string != cultureName) {

        // Force a valid culture in the URL
        RouteData.Values["culture"] = cultureName.ToLowerInvariant(); // lower case too

        // Redirect user
        Response.RedirectToRoute(RouteData.Values);
    }


    // Modify current thread's cultures
    Thread.CurrentThread.CurrentCulture = new System.Globalization.CultureInfo(cultureName);
    Thread.CurrentThread.CurrentUICulture = Thread.CurrentThread.CurrentCulture;


    return base.BeginExecuteCore(callback, state);
}
The final step is to modify the SetCulture action in HomeController.cs
public ActionResult SetCulture(string culture)
{
    // Validate input
    culture = CultureHelper.GetImplementedCulture(culture);
    RouteData.Values["culture"] = culture;  // set culture


    return RedirectToAction("Index");
}
NOTE: To force the default culture appear in the URL, simply set the default value for culture in RouteConfig.cs to string.Empty
Summary
Building a multilingual web application is not an easy task. but it’s worth it especially for web applications targeting users from all over the world, something which many sites do. It is true that globalization is not the first priority in site development process, however, it should be well planned early in the stage of development so it can be easily implemented in the future. Luckily, ASP.NET supports globalization and there are plenty of .NET classes that are handy. We have seen how to create an ASP.NET MVC application that supports 3 different languages, including a right-to-left one, which requires a different UI layout. Anyway, here is a summary of how to globalize a site in ASP.NET MVC:
- Add a base controller from which all controllers inherit. This controller will intercept the view names returned and will adjust them depending on the current culture set.
- Add a helper class that stores the list of culture names that the site will support.
- Create resource files that contain translation of all string messages. (e.g. Resources.resx, Resources.es.resx, Resources.ar.resx, etc )
- Update views to use localized text.
- Localize javascript files.
I hope this helps.
Any questions or comments are welcome.